Quickest PPT to Video Method?
In a world where video content reigns supreme, the ability to transform static PowerPoint presentations into dynamic videos can be a game-changer. Whether you're a teacher looking to bring lessons to life, a marketer aiming to captivate an audience, or a professional striving to make an impact in virtual meetings, the question stands: What is the fastest way to create a video from a PPT? 💻With attention spans dwindling and the demand for engaging content at an all-time high, speed and efficiency in video production are not just desirable – they are essential. But how do you navigate the multitude of methods available and select the one that aligns with your urgency and quality standards? This is where our journey begins, as we uncover the quickest routes to convert your well-crafted slides into a compelling video narrative.✨
From AI video generators that promise to do the heavy lifting for you to PowerPoint's own built-in recording feature that might just be the unsung hero you've been overlooking, we'll explore the ins and outs of each method. And for those who favor a hands-on approach, we'll delve into the world of screen recording software, where control meets creativity. But with multiple paths leading to the same destination, how do you know which one to take? In this essential guide, we'll not only compare the different video creation methods for presentations but also provide additional tips and tricks to enhance your final product. By the end of this post, you'll be equipped with the knowledge to determine the best video production tool tailored to your needs, ensuring that your message is not just seen but felt and remembered. Are you ready to transform your PowerPoints into engaging videos at record speed? Let's dive in!🚀
Method 1: Using AI Video Generators
In the ever-evolving landscape of corporate training, AI video generators are becoming an indispensable asset. DeepBrain AI's AI Studios stands out as a prime example, offering an innovative way to convert PowerPoint presentations into immersive video lectures. This platform uses the latest AI technology to simulate human-like avatars, providing a personal touch to digital education.
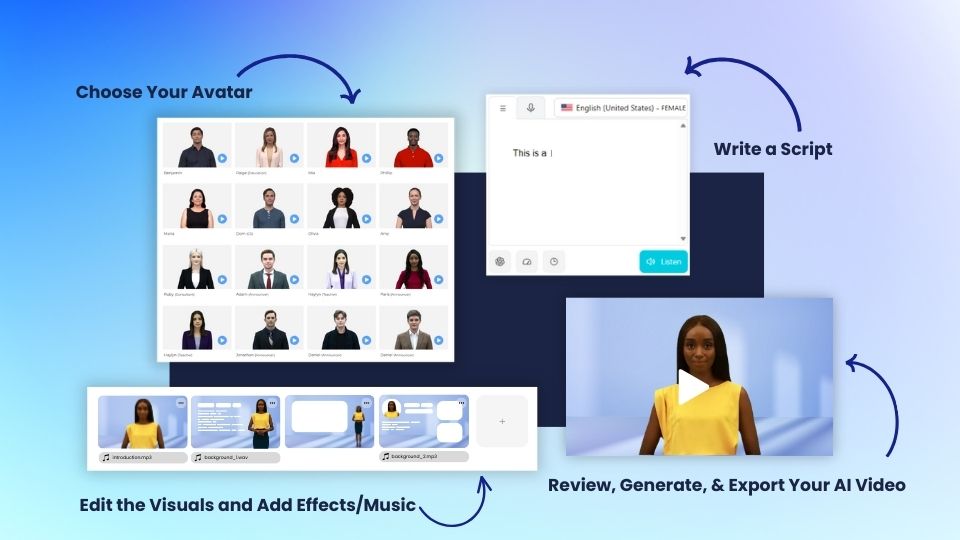
5-Step Process with AI Studios
Step 1: Prepare Your Presentation Content
- Start by organizing your PowerPoint slides or any text-based content you intend to use for your presentation video. Ensure the material is clear, concise, and formatted to facilitate an effective learning experience.
Step 2: Choose the Right AI Avatar
- Access AI Studios and select an AI avatar that aligns with the tone and context of your presentation video. The platform's range of avatars ensures you can match the virtual presenter to the subject matter, creating a more authentic and engaging lecture.
Step 3: Customize Your Lecture Video
- Customize your video lecture within AI Studios by integrating animations, background music, and various design elements. This step is crucial for adding a creative flair to your content, making the lecture not only informative but also engaging.
Step 4: Generate Your Video with AI
- With your content and avatar ready, let AI Studios do the heavy lifting. The AI Video Generator will synthesize your selections into a coherent and polished video lecture, drastically reducing production time while maintaining a high standard of quality.
Step 5: Export and Share Your Lecture
- Once your video lecture is crafted, AI Studios provides you with export options to accommodate different quality preferences and file formats.
AI Studios Features and Advantages
DeepBrain AI’s AI Studios is revolutionizing the way we create and distribute video content, especially in the realm of e-learning and corporate training. By integrating state-of-the-art AI technology, AI Studios simplifies the production process while delivering high-quality, engaging video lectures. Below is a table that outlines the key features and advantages of AI Studios, as well as pricing information to help you make an informed decision for your content creation needs.
Method 2: Using PowerPoint's Built-In Recording Feature
Elevate your PowerPoint presentations into dynamic video content with PowerPoint's integrated recording capabilities. This expanded guide will walk you through the process, ensuring you produce a clear and engaging video presentation.
Step 1: Slide Optimization
- Carefully review your PowerPoint slides to confirm all content is precise and visually appealing. Fine-tune animations, check multimedia integrations, and rehearse any transitions to ensure they contribute effectively to your narrative. This preparation is crucial for a seamless recording session.
Step 2: Initiate the Recording Feature
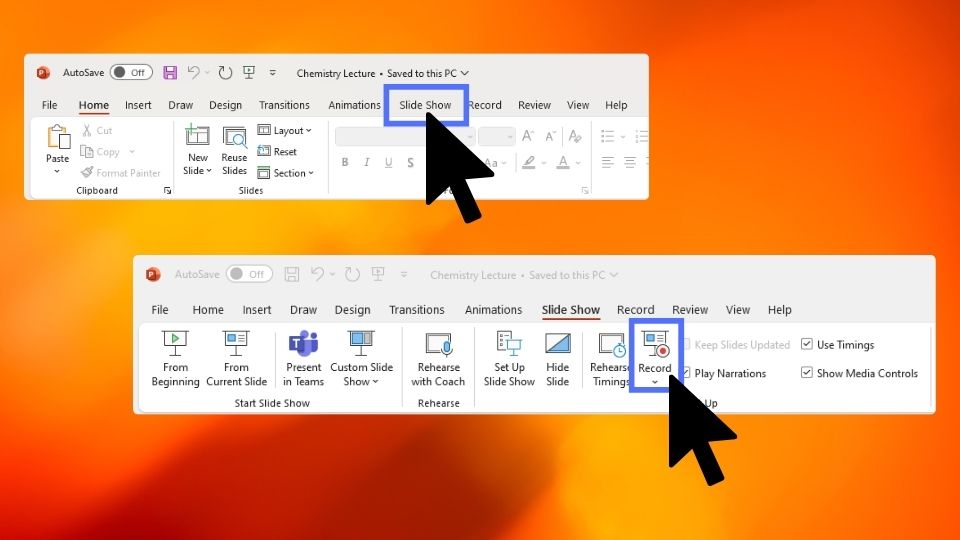
- Navigate to the "Slide Show" tab within PowerPoint and select the "Record Slide Show" option. You're provided with the choice to start from the beginning or pick up from a particular slide, allowing you to segment your recording as needed.
Step 3: Deliver and Capture Your Presentation
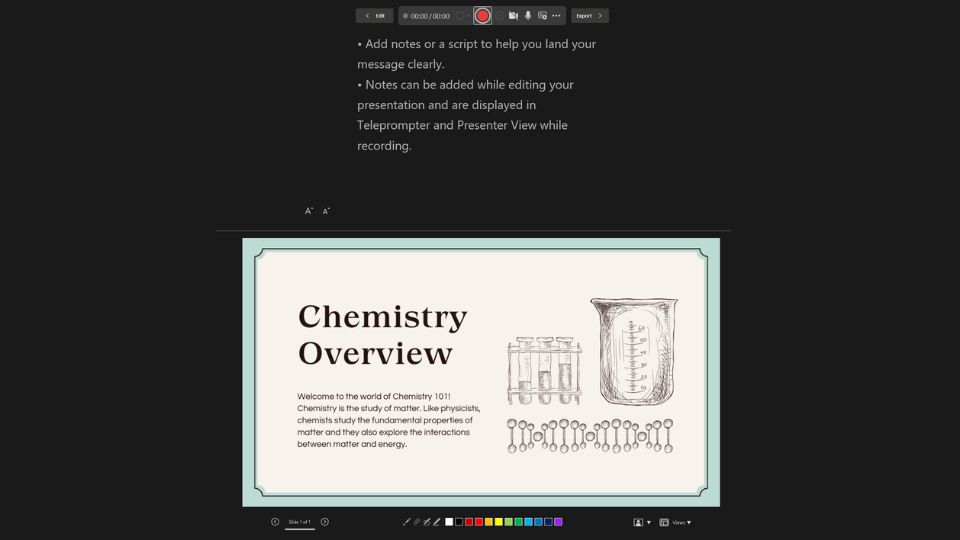
- When you're ready, start the recording and enter full-screen presentation mode. As you progress through the slides, articulate your points clearly, using the pause feature to take breaks or the resume option to continue. This control over the recording pace is ideal for ensuring a polished delivery.
Step 4: Conversion to Video
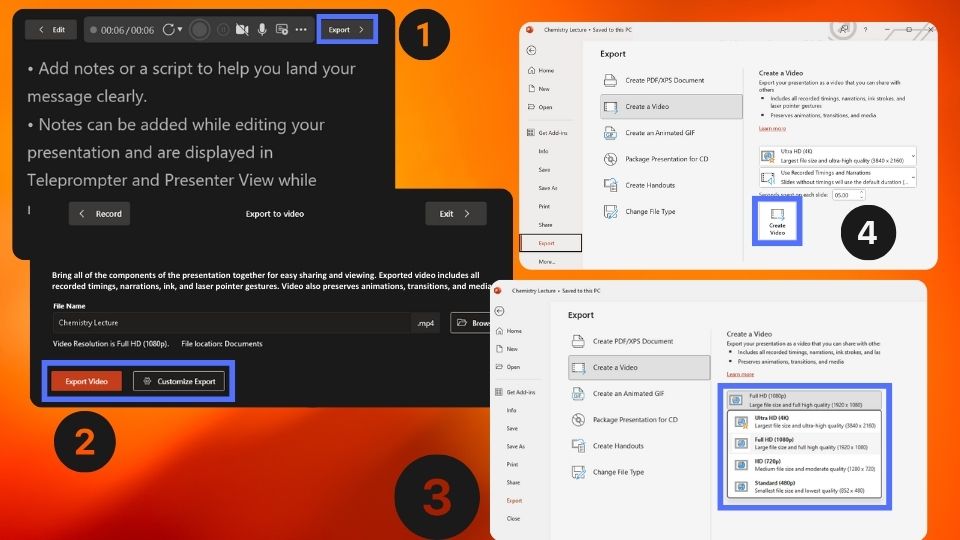
- Conclude your recording and proceed to save your work. Choose "Save As" from the "File" menu and select a video format, such as "MPEG-4 Video" or "WMV format," to convert your presentation into a video file suitable for various platforms.
Step 5: Perform a Thorough Review
- With your video saved, conduct a full review to ensure audio clarity and visual synchronization. This is the time to make any final adjustments to your presentation within PowerPoint, then re-export for the finished product.
Method 3: Using Screen Recording Software
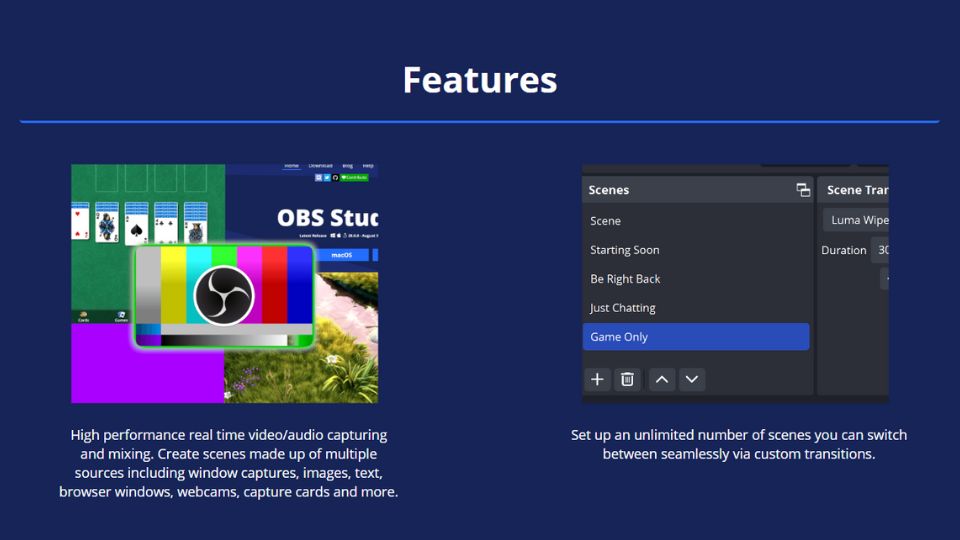
When PowerPoint alone isn't enough, screen recording software like OBS Studio or Camtasia can offer the added control and features needed for a top-notch video presentation.
Step 1: Set Up the Recording Frame
- Launch your screen recording software and adjust the capture area to fit the PowerPoint display on your screen. Make sure any additional content you plan to show is also within the frame.
Step 2: Record the Presentation
- Open your PowerPoint in slideshow mode, hit the record button, and present as if to a live audience. This method allows you to capture everything on your screen, including other applications or web content.
Step 3: Edit and Export
- Use the software's editing tools post-recording to trim, add effects, and ensure your video is concise and engaging. Once edited, export your video in a format suitable for your audience, like MP4 for its wide compatibility.
Step 4: Final Review
- Watch your video thoroughly to catch any errors and confirm the audio is clear and synchronized. Make any necessary edits to polish your video before it's ready to share.
Comparison of Video Creation Methods for Presentations
When it comes to creating video content from presentations, there are several methods available, each with its own set of features and benefits. Below is a comparison table that integrates the three methods discussed—AI Video Generators, PowerPoint's Built-In Recording, and Screen Recording Software.
Additional Tips and Tricks
- Rehearse Timings: If you're not recording live narration, you can rehearse and record slide timings to ensure your video flows smoothly.
- Use Annotations: Some screen recording tools allow you to draw and highlight on your slides during the recording, which can make your video more interactive.
- Compress Media: To reduce the file size, compress images and media in PowerPoint before exporting your presentation.
How to determine the best video production tool?
Each method of creating video content from presentations offers unique advantages, with AI Studios by DeepBrain AI standing out for its advanced capabilities and ease of use. Whether you prioritize the AI-driven sophistication of AI Studios, the straightforward simplicity of PowerPoint's built-in recording, or the versatility of screen recording software, your choice will depend on your specific needs and resources. AI Studios excels in producing high-quality, engaging content with minimal effort, making it an excellent choice for those seeking to streamline their video production process. Ultimately, the right tool for you will align with your goals, audience, and the level of customization you desire for your video lectures or presentations.